
Custom Pages are where most of the content in your app will go. As the name implies, they can be heavily customized, which makes them a great fit for most types of content.
We've embedded a video overview demonstrating how Custom Pages work below. If you prefer step-by-step screenshots, you can find those below the video.
As a general rule of thumb, it is important to click the blue "Save" button frequently throughout the editing process.
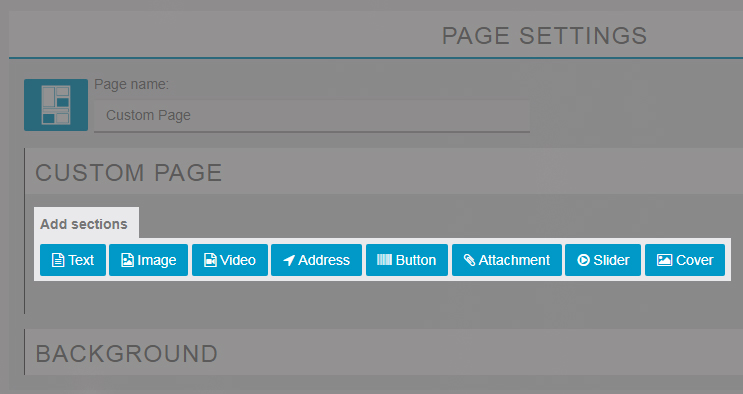
Below are the different types of sections you can add to a Custom Page. You can add multiple sections to the same page, so feel free to experiment!
You can use this table of contents to jump to a specific section and learn more about how to use it.
When adding a text section, you'll see a block where you can enter text, and several basic text editing tools to change the appearance of the text. If you've worked with Microsoft Word or other word processors before, most of these tools will be familiar to you.
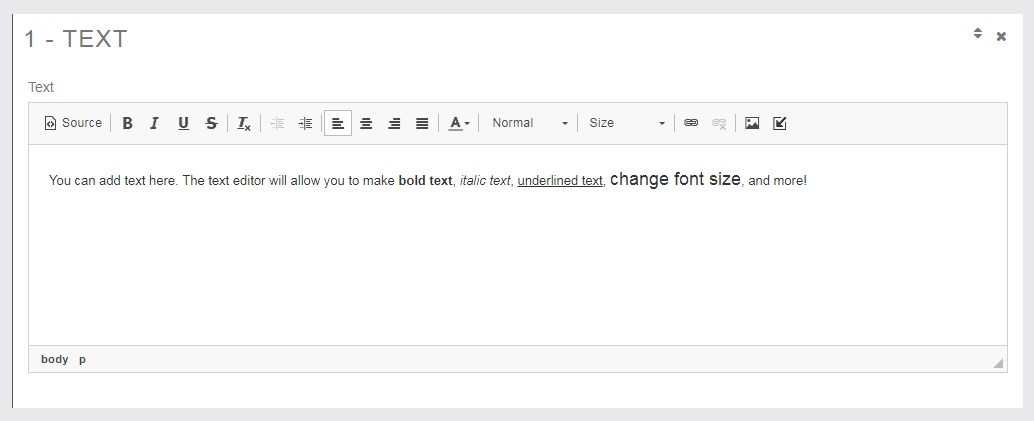
In addition to changing the appearance of text, the tools on the right side of the text editor bar will allow you to insert external and internal links.
|
To create an external link, meaning a link to a web page outside of your app, click the You'll see these options: |
To create an internal link, meaning a link leading to another section of your app, click the |
|
|
|
| Whatever you set as the "Display Text" is what will actually appear in the article as a clickable link. Whatever you set as the "URL" is where the link will lead. You'll want to copy and paste the link destination into this field. |
Note that in order to create an internal link, the page you're linking to must already exist. If you'd like to link to an event registration form, for example, you'll want to finish setting up that form before you can link to it. |
 icon.
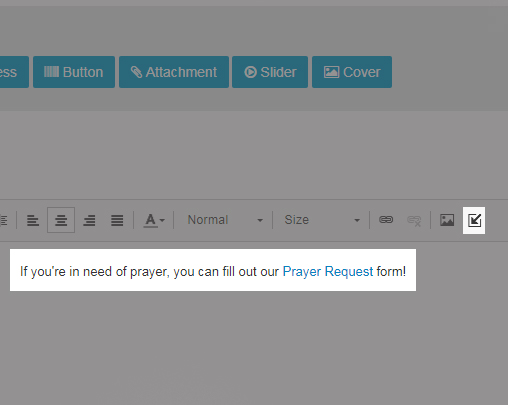
icon. icon. This will pull up a list of the other sections in your app, allowing you to easily link to another section. Simply click the name of the section you want, and the app editor will insert a link:
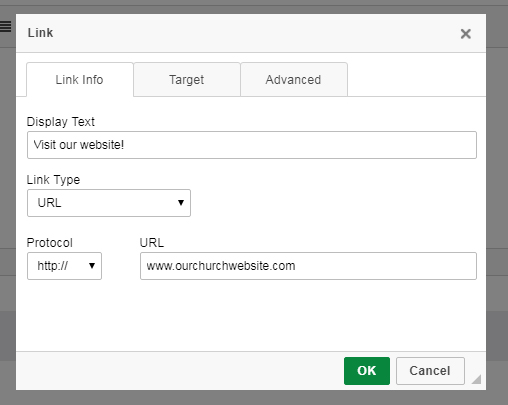
The "Image" section of a custom page functions like a miniature photo gallery. After adding an image section, you'll see two options:

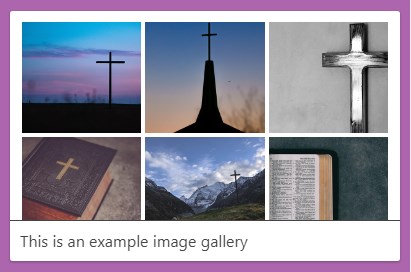
Description: This is where you can add a short description to help viewers identify what they're looking at. This is completely optional, but it can be helpful to viewers.
Add pictures: Clicking this will open a small window where you can select which images you would like to upload from your computer. Select your images and then click "Open."
After you've uploaded your photos, click the blue "Save" button in the upper right. The app preview screen should update to display your now gallery. It'll appear like the small gallery you see on the right.
Note that the app will display smaller versions of the image, called "thumbnails" - if a viewer taps on one of the images, it will load the full-sized version so they can get a better look at it.
The Video section of a custom page will allow you to embed videos. Note: Your video will need to be hosted external, as you will provide a URL source for the app to load the video.
After adding a video section, you'll see the options below:

YouTube: We recommend using YouTube, as it is the world's largest video hosting platform and tends to work very reliably. Many churches and religious organizations today share video messages on their YouTube channels to make them easily accessible for everyone to view. If you would prefer your videos stay hidden and only be accessible through the app, YouTube can accomplish this too. You'll want to mark your videos as "unlisted" when you upload them. This will prevent the videos from appearing in any YouTube search, and they will only be available through a direct link (which you can then enter into the app).
To add a YouTube video, simply copy and paste the link for the video from your address bar into the YouTube URL field in the app.
Podcast: If you already use a video hosting source that is set up for podcasting (meaning it has an RSS feed), you can copy and paste the feed link into the field on the podcast tab. After that, you're all set - the app will automatically pull in any new videos added to the feed.
My Video: This third option will allow you to link to an MP4 video from any other source if you can provide a direct link. This will allow you to use other video hosting sources such as Vimeo, DailyMotion, and others as long as they provide embeddable links.
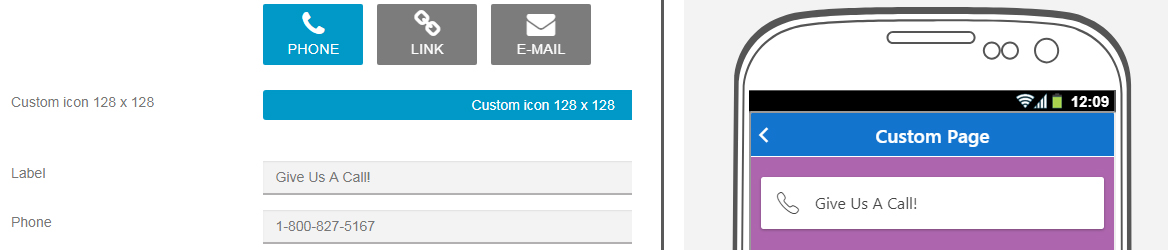
Adding a button to a custom page will allow you to enable one-touch calling, one-touch emailing, or set links as clickable buttons.
Phone: When creating a custom call button, whatever you set as the "Label" is what will appear on the button, and whatever you enter in the "Phone" field is the number that will be dialed when users press the button. Please note that this feature will only work when clicking the call button on a mobile device with an active service plan from a wireless provider.
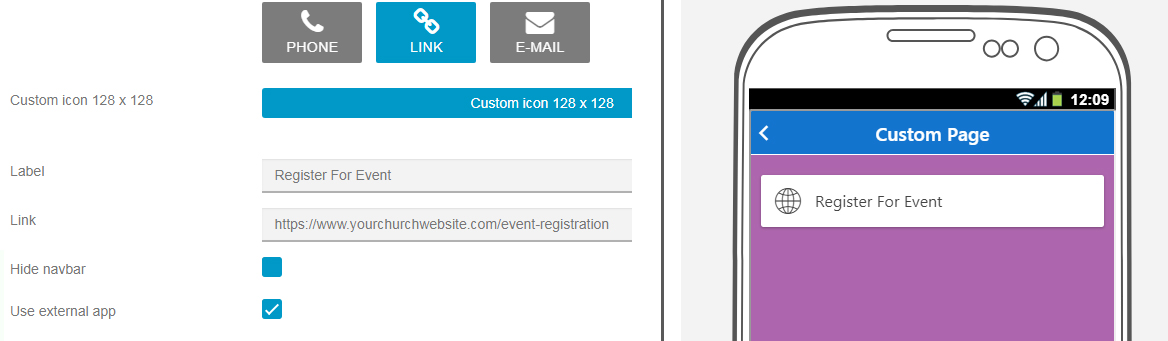
Link: This will function just like a regular link, but mapping it to a button instead of blue underlined text can be a nice visual touch for viewers.
- Be sure to click the checkbox for "Use external app" - this will tell the app to open that link using your device's default web browser.
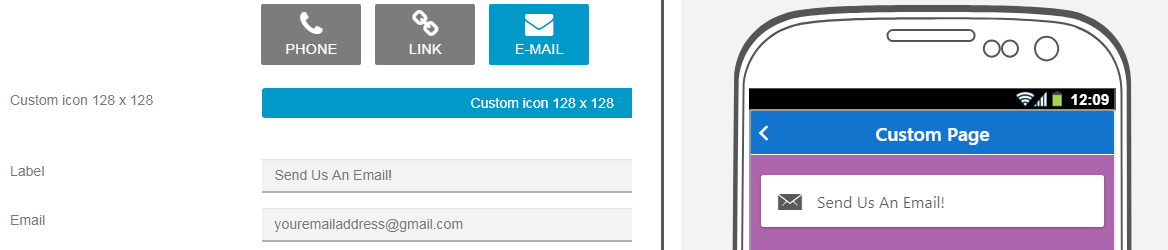
E-Mail: This will add a button to let people easily email you. Clicking this link will open a new email message and automatically set your email address as the recipient. This works best on mobile devices, but may work on computers as well if you have a mailing client (such as Outlook) installed.
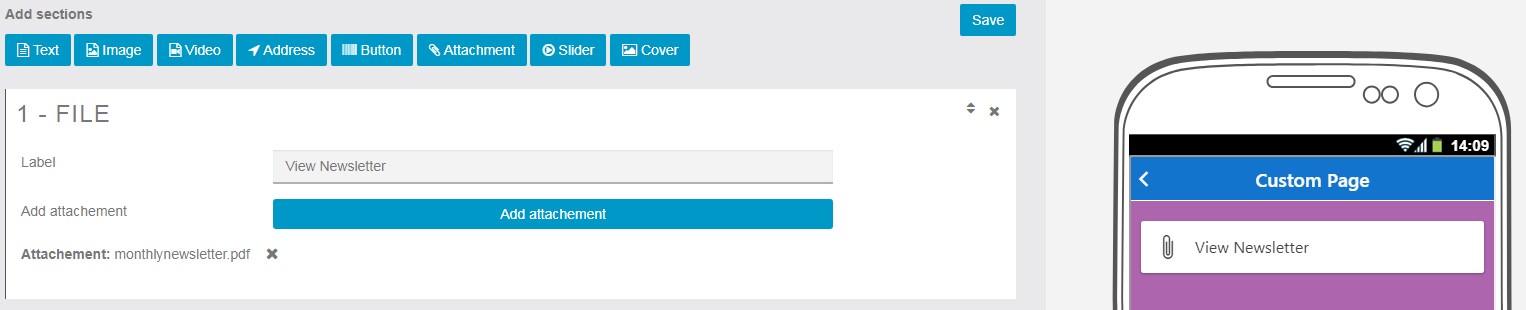
This section can be used to upload files and allow users to view or download them. If your church uses PDF files for upcoming events or monthly newsletters, this is a great way to share them.
As with the button section above, whatever you enter in the "Label" field is what will appear for viewers to click. When you click "Add Attachment," it will open a small window where you can select which PDF file to upload from your computer.
This section works allows you to upload several photos, much like the Image section above, with one key difference. Instead of displaying a miniature gallery with multiple thumbnails, the Slider section will show one photo at a time and allow viewers to swipe left or right to view more photos. You can add an optional description to help viewers identify what they're looking at.

This section will allow you to upload an image and display it across the whole width of the page. This works especially well if you have a custom graphic that you would like to use as the introduction to a text section, like below:
